
Spring is in the air – I can almost smell it! The warmer temperatures, strong solar radiation and clear skies bring on a new set of challenges. The snowpack undergoes rapid change throughout the day as the sun cycles around the planet, and so does the avalanche hazard rating. Some avalanche problems, such as wet slabs, cornices and wet loose avalanches, become commonplace, especially as freezing levels rise above mountain tops. With longer days and clearer skies, it’s also a great time to plan those big ski-mountaineering days, bootpack up tall peaks and shred buttery corn snow. Spring ski touring gear, such as crampons and ice axes, goes a long way to reaching your prized objective and is often essential to travelling safely through our mountain playground. As a foretaste, it’s worth reading the two posts below to better prepare you for spring ski touring.
Related: 1. Spring Ski Touring Basics: Weather, Corn Skiing And Avalanches 2. Planning A Spring Ski Tour: Optimize Your Peak Pursuit

The essentials of spring ski touring
Skis: While you can use any ski to get around in spring, I recommend skinnier skis. I’d target an underfoot width ranging between 90-100mm with a wider shovel in the front (130-140mm). Ideally, you’re looking for a ski that can handle the wide variety of spring conditions from firm snow to blower powder. It’s important to strike a balance between the following goals:
- Hold an edge on firm snow, which you’ll encounter often in spring
- Offer a low weight to optimize your energy expenditure on long ski-mountaineering days
- Have a wide enough shovel and underfoot width to handle those awesome spring powder days.

No ski can check all the boxes perfectly. You’ll have to sacrifice in some way. Now, it’s up to you to decide where to sacrifice. I prefer a slightly heavier ski that can hold an edge when skiing variable snow down a steep couloir or that can open up the throttle on a massive alpine face. Being a fervent downhill skier, I naturally prioritize “skiability” over weight. Some choose a skinny lightweight ski, compromising on skiability, but maximizing uphill efficiency. A little soul searching and experience in varied snow conditions will help you find your perfect balance. For more details on picking the right ski, check out the following post: How To Choose Touring Skis.
Bindings: Pin bindings (low-tech bindings) are an essential part of your spring ski touring gear quiver. Nowadays, modern pin bindings are anything but low-tech. Designers and engineers figured out how to build low-weight, user-friendly and durable pin bindings perfectly suited for spring ski touring. Gone are the days of hauling 3kg frame bindings up the hill!

Here’s one question I get asked all the time: Do you run ski brakes and ankle leashes on your setup? I run brakeless bindings and no leash. In my opinion, going brakeless removes a failure point on my setup. I often eavesdrop on folks complaining about their brakes releasing unexpectedly while touring. In powder, brakes don’t do much to stop the ski as it rockets down the slope. As for leashes, they cause more harm than good. I usually don’t run them on my setup after taking a bad fall where the leash failed to break. The one exception: I use leashes when travelling on glaciers, where the risk of losing a ski in a crevasse far outweighs the risk of a leash mishap when falling. For better insight on choosing the right bindings for you, check out the following post: How To Choose Ski Touring Bindings.
Climbing Skins: I recommend using 100% mohair skins in springtime. The increased glide truly maximizes your uphill efficiency throughout the day. I also find mohair skins tend to avoid snow buildup on a wet skin base, called glopping in the ski touring and splitboarding world. Applying skin wax preemptively at the beginning of the day or when the snow moistens helps reduce glopping. For a deeper dive on ski touring bindings, check out the following post: How To Choose Climbing Skins For Ski Touring.
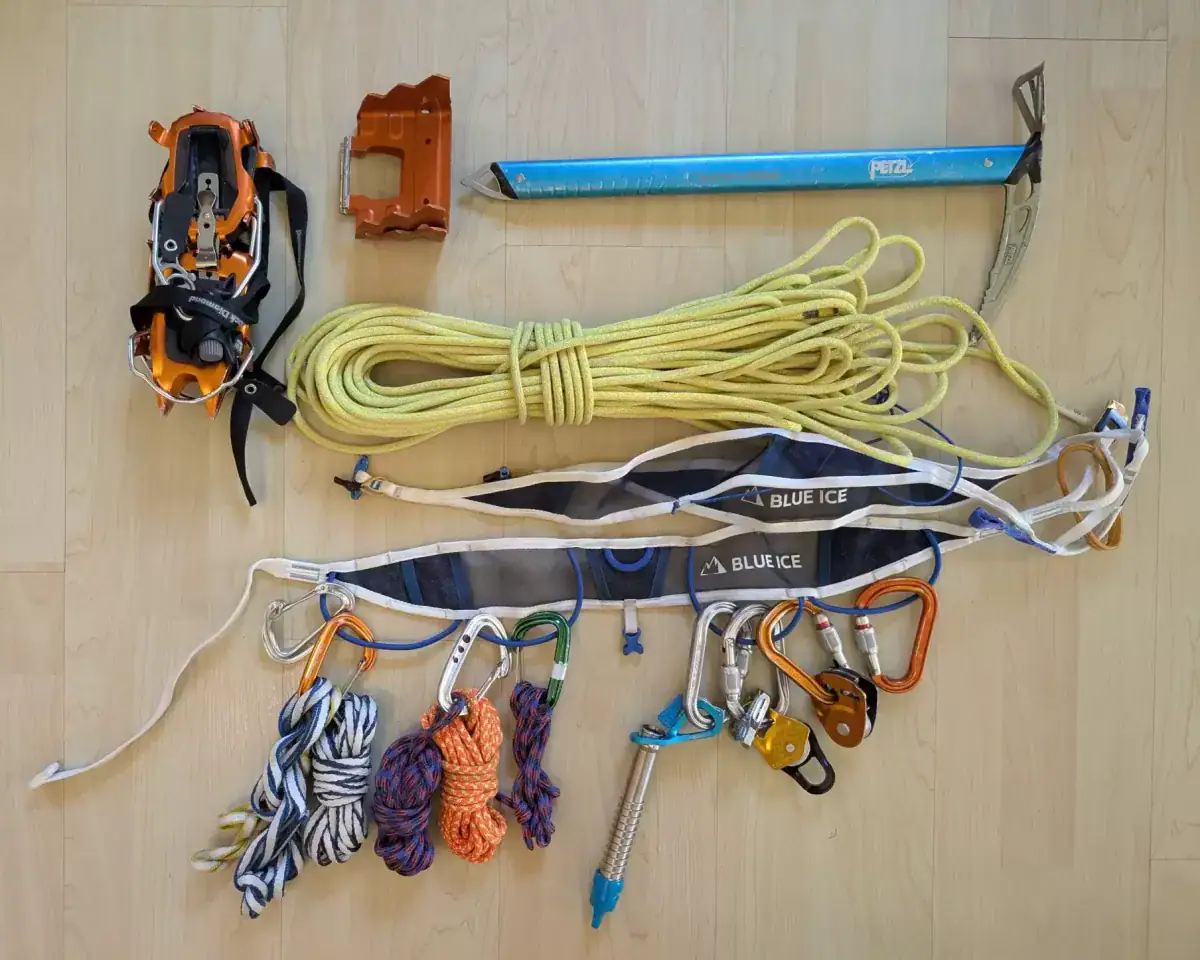
The Bits and Bobs Of Ski Mountaineering Gear
Ski tourers and splitboarders love sharp, pointy tools. Ice axes, ski crampons, ice screws, you name it! They’re a crucial part of spring ski touring gear and rather situational.
Related: What To Pack For A Ski Tour: A Comprehensive Guide (Ski-Mountaineering Gear)
Ski Crampons: Those are constantly strapped to my hip belt starting in April when early morning conditions are icy due to the spring freeze-thaw cycle. They are essential when ascending refrozen snow and exposed features where slipping would be treacherous. A good pair of aluminum ski crampons should be slightly wider than the waist width of your skis. Too wide and they’ll interfere with your touring stride.
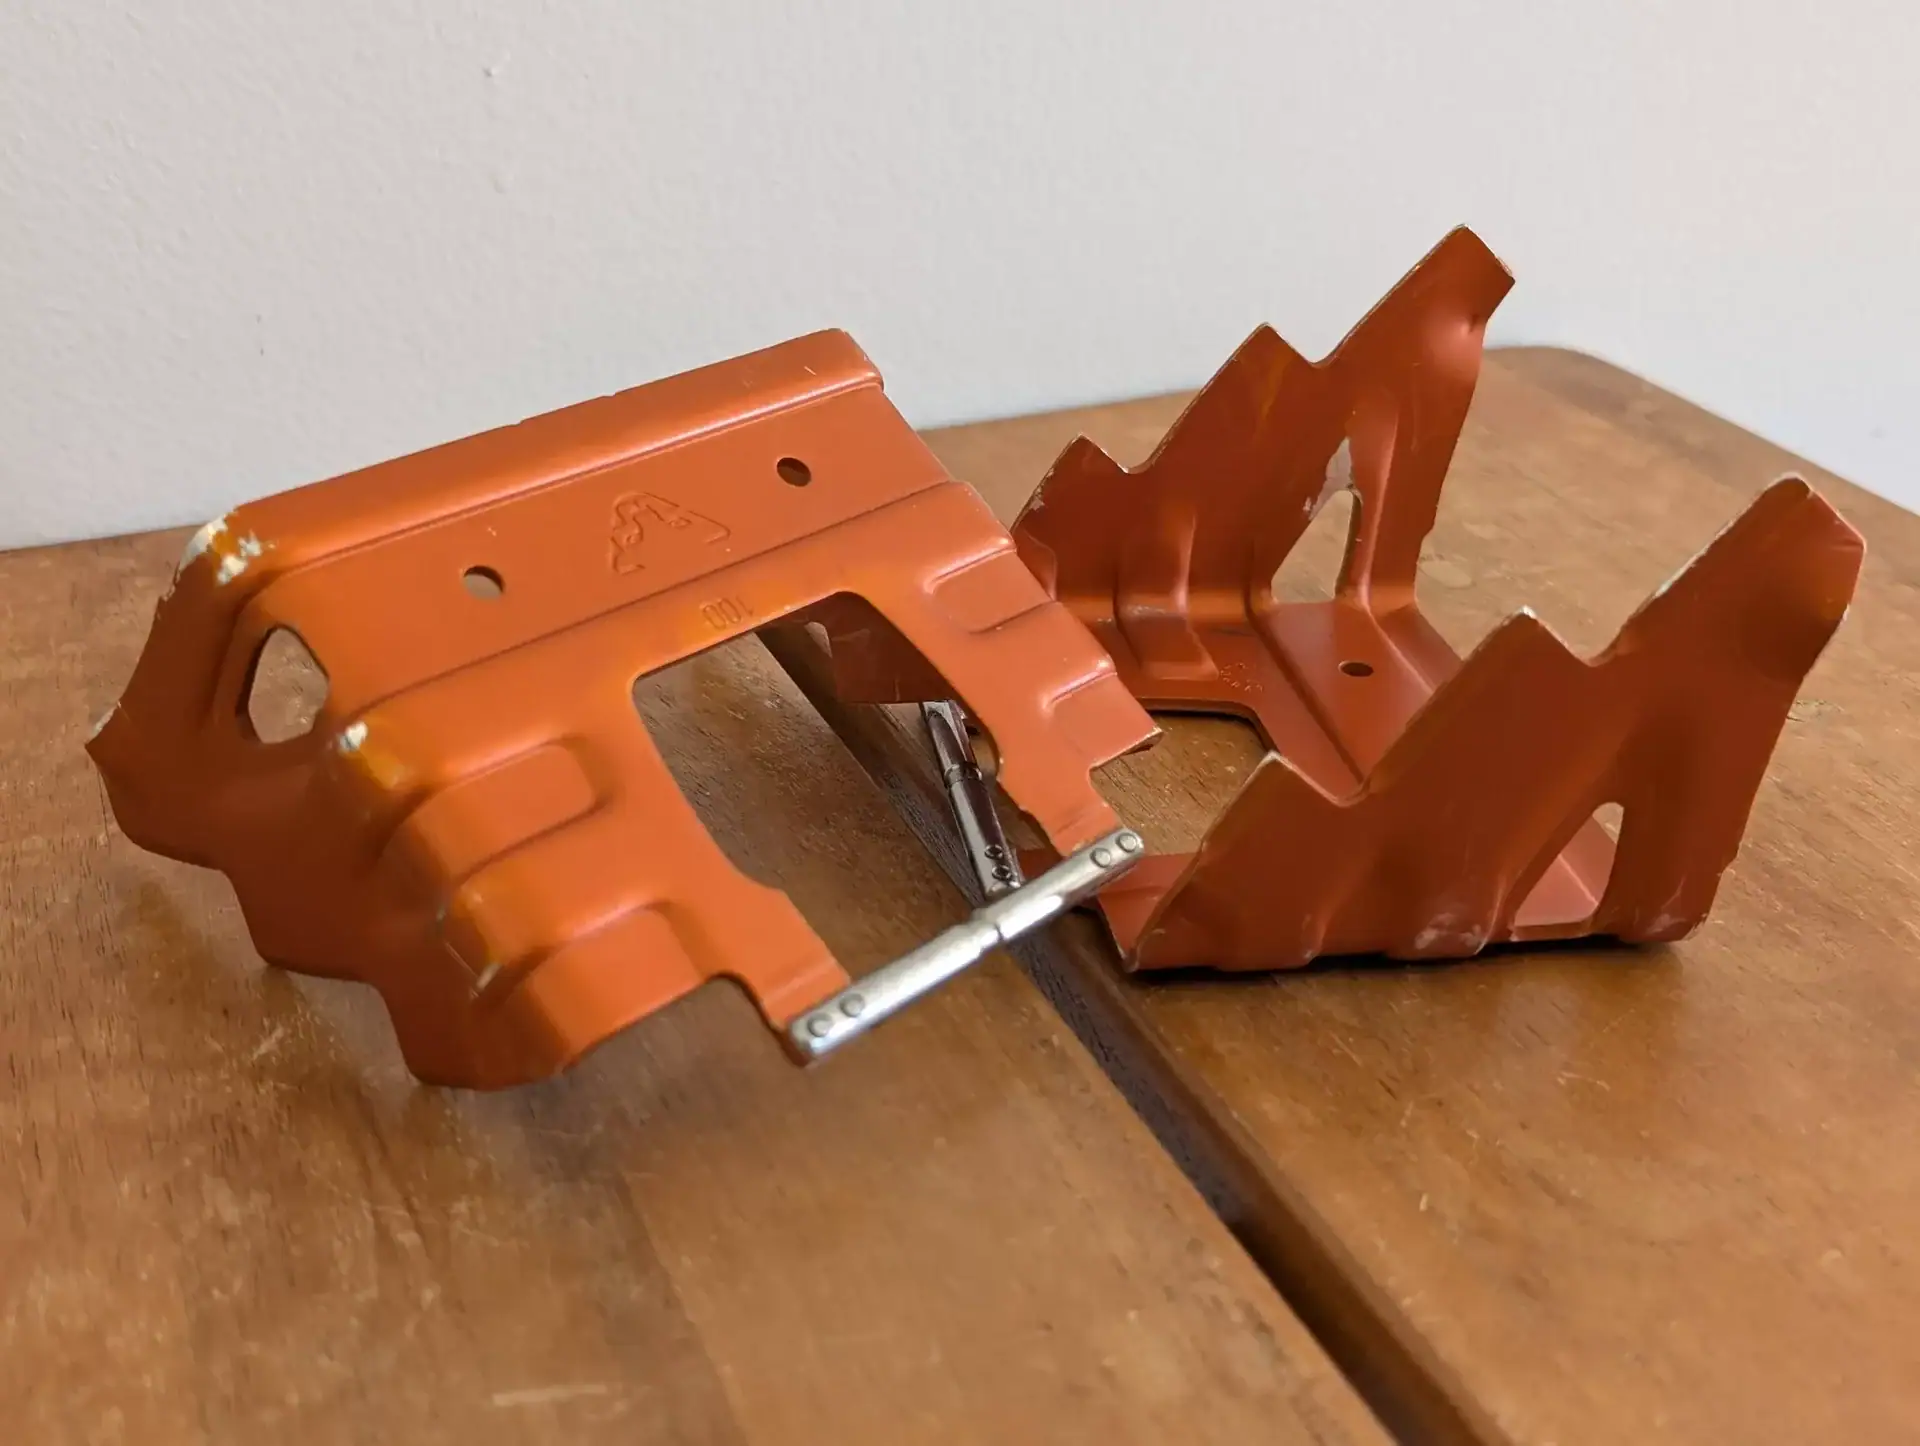
They’re especially important for splitboarders with less of an effective edge. Splitboards in uphill mode tend to offer less grip on firm snow than skis. Always ensure to test fit the ski crampons to your setup before heading out in the backcountry. Ski crampons aren’t universal and fit specific binding brands.
The Uptrack's Tips and TricksBoot Crampons: Your spring ski touring gear closet always includes a good pair of lightweight boot crampons made of either aluminum or steel. Aluminum boot crampons sacrifice durability in favour of low weight. If your planned route involves drawn-out scrambles on bare rock, aluminum crampons will wear quickly and often break.

I use hybrid crampons which utilize steel where it truly matters – on the front points – and an aluminum rear piece which offers a balance of durability and weight. The Petzl Irvis Hybrid boot crampons strike that balance with ease. Practice strapping them to your ski boots and verify the fit before heading out for a big ski-mountaineering day.
Ice axe: A lightweight ski touring ice axe provides an additional layer of safety when travelling on glaciers or climbing steep snow slopes. It can also be used as an arm extension when scrambling up peaks.

Some manufacturers sell all-aluminum ice axes specifically designed for ski mountaineering on snowy slopes. While acclaimed for their low weight, I prefer an ice axe with a steel pick and an aluminum shaft as a good compromise between weight and durability when climbing technical rock routes. Since you’ll be using it on steep snow slopes, ski-mountaineering axes are typically shorter than their summer mountaineering counterpart. Double up on the axes if you’re expecting to climb a particularly exposed section. The added safety is a great idea!
Harness & All The Dangly Bits: A ski touring harness is designed with low-weight and all-day comfort in mind. You’ll be amazed at how light those things are. How on Earth do they hold a crevasse fall? Well, they do, a testimony of advanced material science and careful engineering. The harness and the bits & bobs dangling from it are required when travelling on crevassed glaciers or skiing technical routes involving rappels and belays.
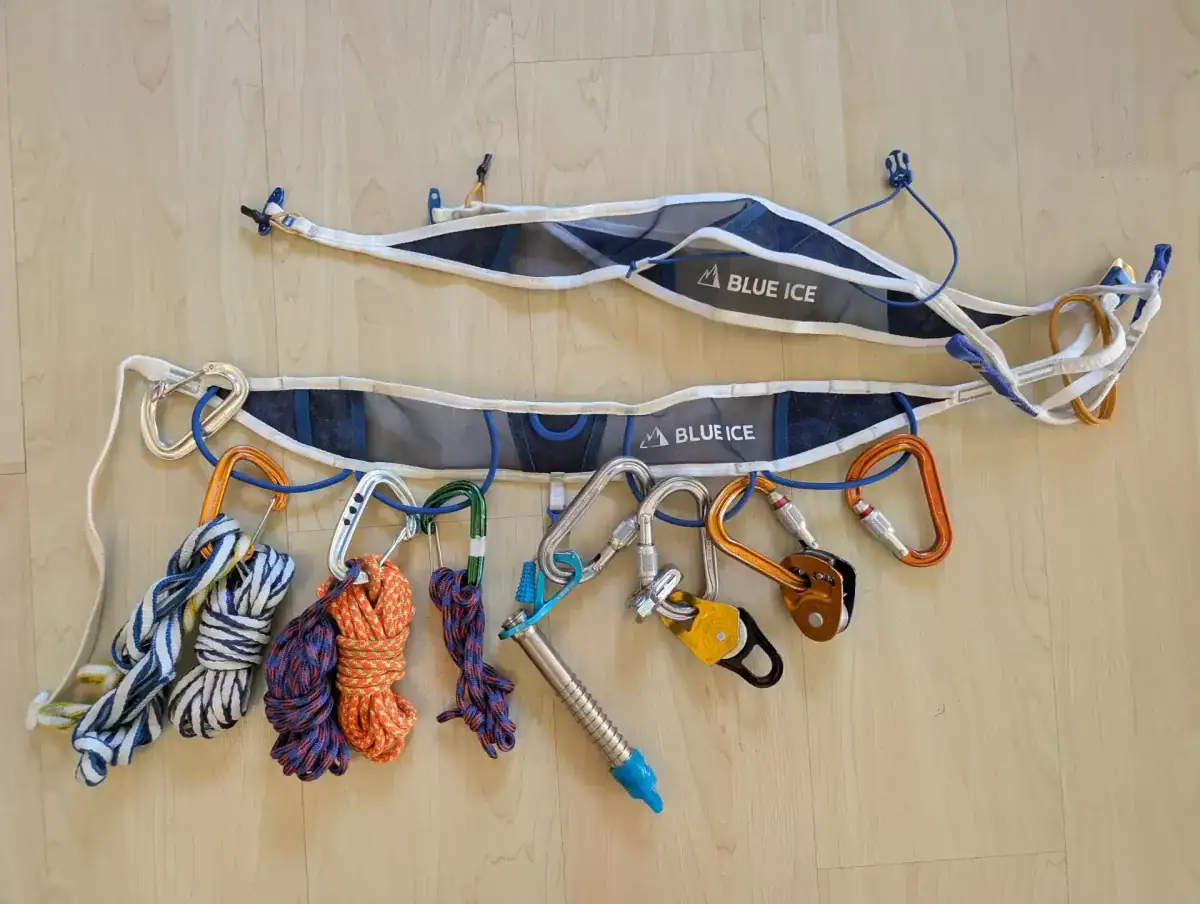
Specific objectives can require advanced rock protection or extra accessory cord/slings to build bomber anchors. Do your research to avoid heading out the door unprepared. For standard glacier travel, I typically carry enough gear to rescue from a crevasse fall effectively. It includes the following:
- 4 non-locking carabiners
- 3 locking carabiners
- 2 120cm slings
- A 240cm sling
- 2 bundles of 5mm accessory cord (10m total)
- 1-2 friction-reducing pulley (Petzl Partner)
- A progress capture device (Petzl Micro-Traxion)
- A 16cm steel ice screw (Blue Ice Aero)
Hyperstatic Ropes: While a single ropes (9-10mm in diameter) work fine to arrest crevasse falls and rappel into big mountain lines, they are rather heavy to carry up a mountain. Most people now use lightweight, hyperstatic ropes (6mm diameter) engineered for glaciated travel, crevasse falls and technical rappels.

Hyperstatic ropes are designed to minimize rope stretch under load. It increases their efficiency when rigging rescue systems and hauling people out of crevasses. However, those fancy (and expensive) ropes have their limitations. Hyperstatic ropes aren’t designed to take lead falls and shouldn’t be used near sharp rocks. Their skinny diameter makes them prone to slicing. On the flipside, a study by Petzl has shown that hyperstatic ropes are more effective at arresting crevasse falls than regular climbing ropes due to how the shock load is absorbed. The skinny glacier ropes only work in tandem with approved hardware such as the Petzl Micro-Traxion.
Springtime Extras
There are a few extras that should be included in your spring ski touring gear bag: alpine sunscreen, shaded headwear and glacier sunglasses. Those components are indispensable when the sun is beating down on your head. They will save you from getting gnarly sunburns in weird places.
Alpine Sunscreen: If there’s one thing that’s constantly on my mind in spring, it’s the strong solar radiation and how easy it is to burn my skin. The beaming late-season sun reflects off the white snow and tends to irradiate often overlooked body parts such as the bridge of your nose, nostrils and underside of your chin. I’ve even burnt my palate (my mouth’s roof) on a boiling-hot ski traverse many moons ago. Some days, the solar radiation makes it feel like an oven outside. I carry a bottle with 50+ SPF sunscreen for my hands, arms and neck. For my face and lips, a hydrating zinc oxide paste. I wear breathable and UV-protective tops and gloves to shield my skin even more. I apply sunscreen in the morning, lunch and mid-afternoon to guarantee maximum sun protection.

Shaded Headwear: Protective headwear is key to shielding your head from sunburn and potential heat exhaustion. While a breathable cap works well enough, I prefer a wide-brim hat such as the Patagonia Quandary, which provides 360-degree shade and covers the back of your neck. It’s also very packable. On the downside, you can hardly wear it under your downhill helmet.
Glacier Sunglasses: The strong solar radiation during springtime is deadly to the eyes. In the alpine world, this is called “snow blindness”, resulting in unbearable stinging eyes and temporary eyesight loss. It’s a key piece of your spring ski touring gear. Look for sunglasses with flexible side & nose shields, CAT-4 glacier lenses and comfortable temples.

Smart Layering Goes A Long Way
The spring season brings a wide array of weather patterns from endless storms to scorching sun and bluebird days. Wearing the appropriate layer for the atmospheric conditions makes your day a whole lot smoother. I typically carry five layers:
- A moisture-wicking layer
- A lightly insulated jacket
- An insulated puffy
- A windproof and waterproof layer
- An insulated parka (larger overcoat-type puffy)

With experience and common sense, you’ll figure out which layer to wear to minimize overheating and protect yourself from our temperamental Mother Nature. It’s a question of striking a perfect balance, like most things, ski touring or splitboarding. For more insight on picking the right layers, see How To Get Into Ski Touring (Layering).
Pingback: What To Pack For A Ski Tour: A Comprehensive Guide - The Uptrack