
How do you pick the right ski touring boots? With so many options on the market, it can feel overwhelming to choose the perfect ski touring boots. The truth is, modern touring boots are engineering marvels: lightweight yet powerful, efficient yet comfortable. Striking the right balance between stiffness, weight, and usability takes some careful thought. As a nod to the designers who make these boots possible, here’s a quick primer on how to choose your next pair.
Related: How To Choose Touring Skis

Finding The Perfect Fit
First and foremost, let’s get familiar with the golden rule of bootfitting. Find a boot that fits your foot. It’s that simple, lads. Boot models vary in shapes and sizes. Boots with a small arch width, called last, are better suited for skiers with long, slender feet (like me,) and boots with a large foot box volume are ideal for people with sasquatch feet. If the geometry does not agree with your lower anatomy at all, please don’t head down the painful road of mutilating your foot to make it fit. Please don’t. I’ve been there – it hurts. Mind you, there’s a wide enough range of discomfort that a professional bootfit can solve. The procedure’s goal is to secure the foot while maintaining user comfort. It involves shaping custom insoles and moulding the liner as well as the shell using foam inserts and shims. It’s worth its weight in gold. It’s also crucial to be comfortable when ski touring.

The repetitive motion of gliding two skis with your feet encased within a thick foam liner and stiff plastic shell creates the perfect environment for blisters to thrive. In this case, friction becomes both your best ally and worst enemy. On one hand, it provides uphill traction between your climbing skins and the snow surface. On the other hand, it generates heat and sweat, a catalyst for foot blisters. Bootfitting and careful foot care alleviate part of the issue by minimizing movement as well as friction between your foot and the liner.
Key Features Of Ski Touring Boots
Let’s recap the key features to keep in mind when you choose ski touring boots, as discussed in How To Get Into Ski Touring:
- A selective walk mode which decouples the upper cuff movement from the lower shell.
- An increased articulation of the upper cuff and lower shell allowing for a comfortable gait.
- A grooved rubber sole to ease scrambling when gaining ridges and peaks.
- Toe and heel pin inserts, moulded in the plastic sole, and compatible with pin and hybrid bindings
- A lightweight touring liner with added flexibility at the ankle
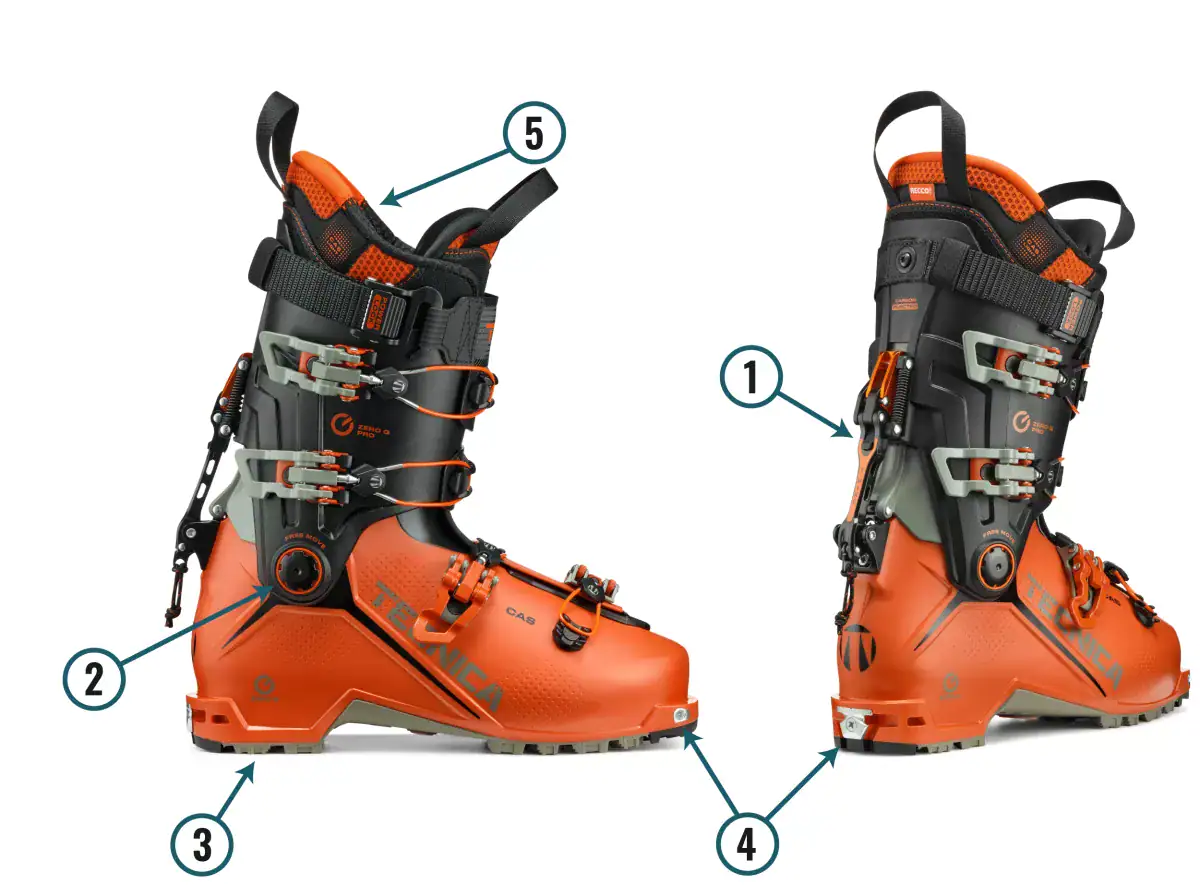
Selective Walk Mode: The walk mode is the single most important part of a ski touring boot. It decouples the back-and-forth motion of the upper cuff from the lower shell by flicking a lever usually located on the spine (the back) of the boot. I always inspect the locking mechanism before deciding on a specific boot model. Too many times have I witnessed levers failing to lock the boot in “ski” mode due to ice, mechanical issues, or user abuse. No one wants to “send it” down a couloir with a wonky boot. Professional gear reviews from reputable websites such as Blister are a great way to get input on the matter.
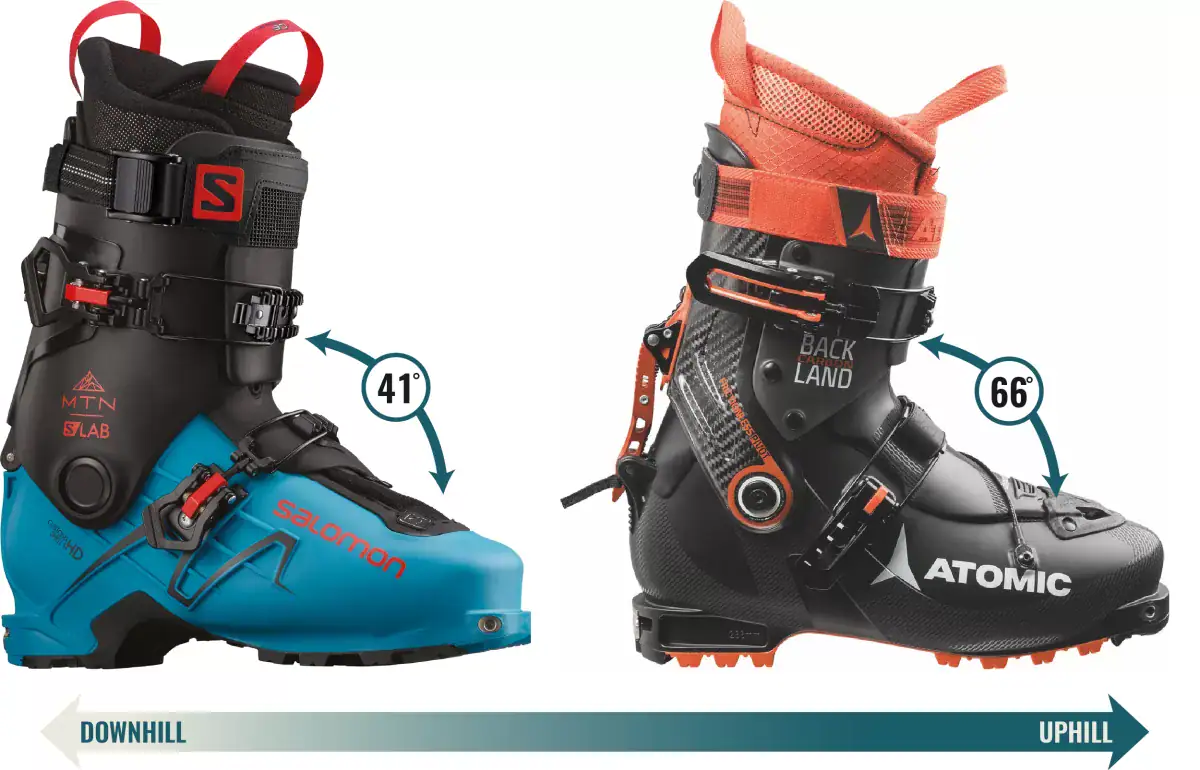
Range of Motion (ROM): The ROM around the pivot (located near the ankle) is also important. Some models offer more range than others, easing climbs on steep slopes. For instance, the Atomic Hawx Ultra XTD 130, which balances the uphill and downhill performances, has a ROM of 41°. At the opposite end of the spectrum, the Atomic Backland Carbon, focusing primarily on the uphill, has a ROM of 66°, a stark difference. Typically, the increased range of motion comes at the detriment of boot stiffness and downhill performance.
Engineered Rubber Sole: The sole of a ski touring boot connects your foot to either the binding or the ground. Its design is of extreme importance for two fundamental reasons:
- The soles provide grip when scrambling on rocks. That grip can be a matter of life or death when ski-mountaineering in gnarly terrain. Typically, Vibram rubber is used for its ideal balance of durability and grip on a wide variety of terrain. Increased grip comes at the cost of decreased longevity. Keep that in mind when shelling out 1000$ for a pair of ski touring boots.
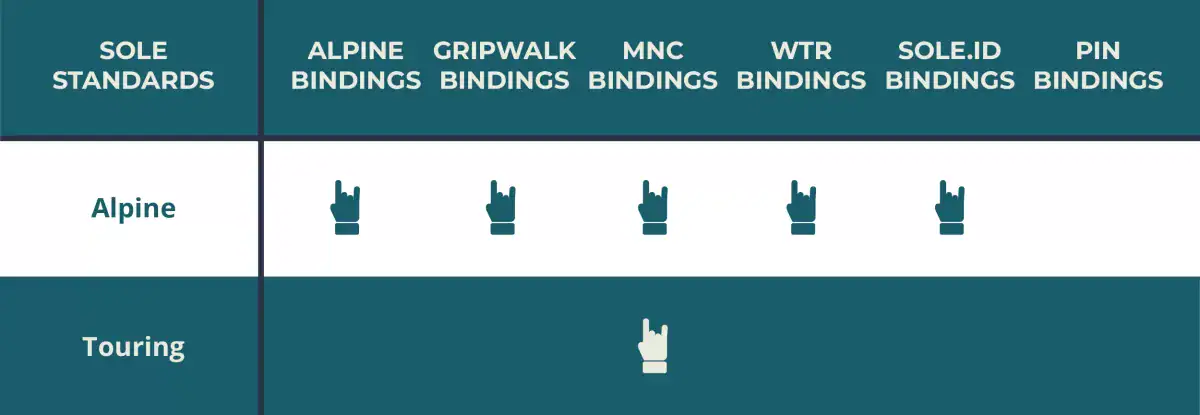
- For some reason, the ski boot industry refuses to standardize sole designs. There are 4 standards: ISO 5355, ISO 9523, GripWalk, and WTR. Each sole standard is only compatible with a specific binding standards.
Tech Inserts: The metal/tech insert is located at the heel and toe welts. The tech binding’s pins clamp onto the inserts for a secure fit. They are required for pin (low-tech), hybrid, and SHIFT bindings. In cold weather, watch out for ice build-up in the inserts. Your binding won’t fully engage the inserts, risking a premature release and season-ending injury.
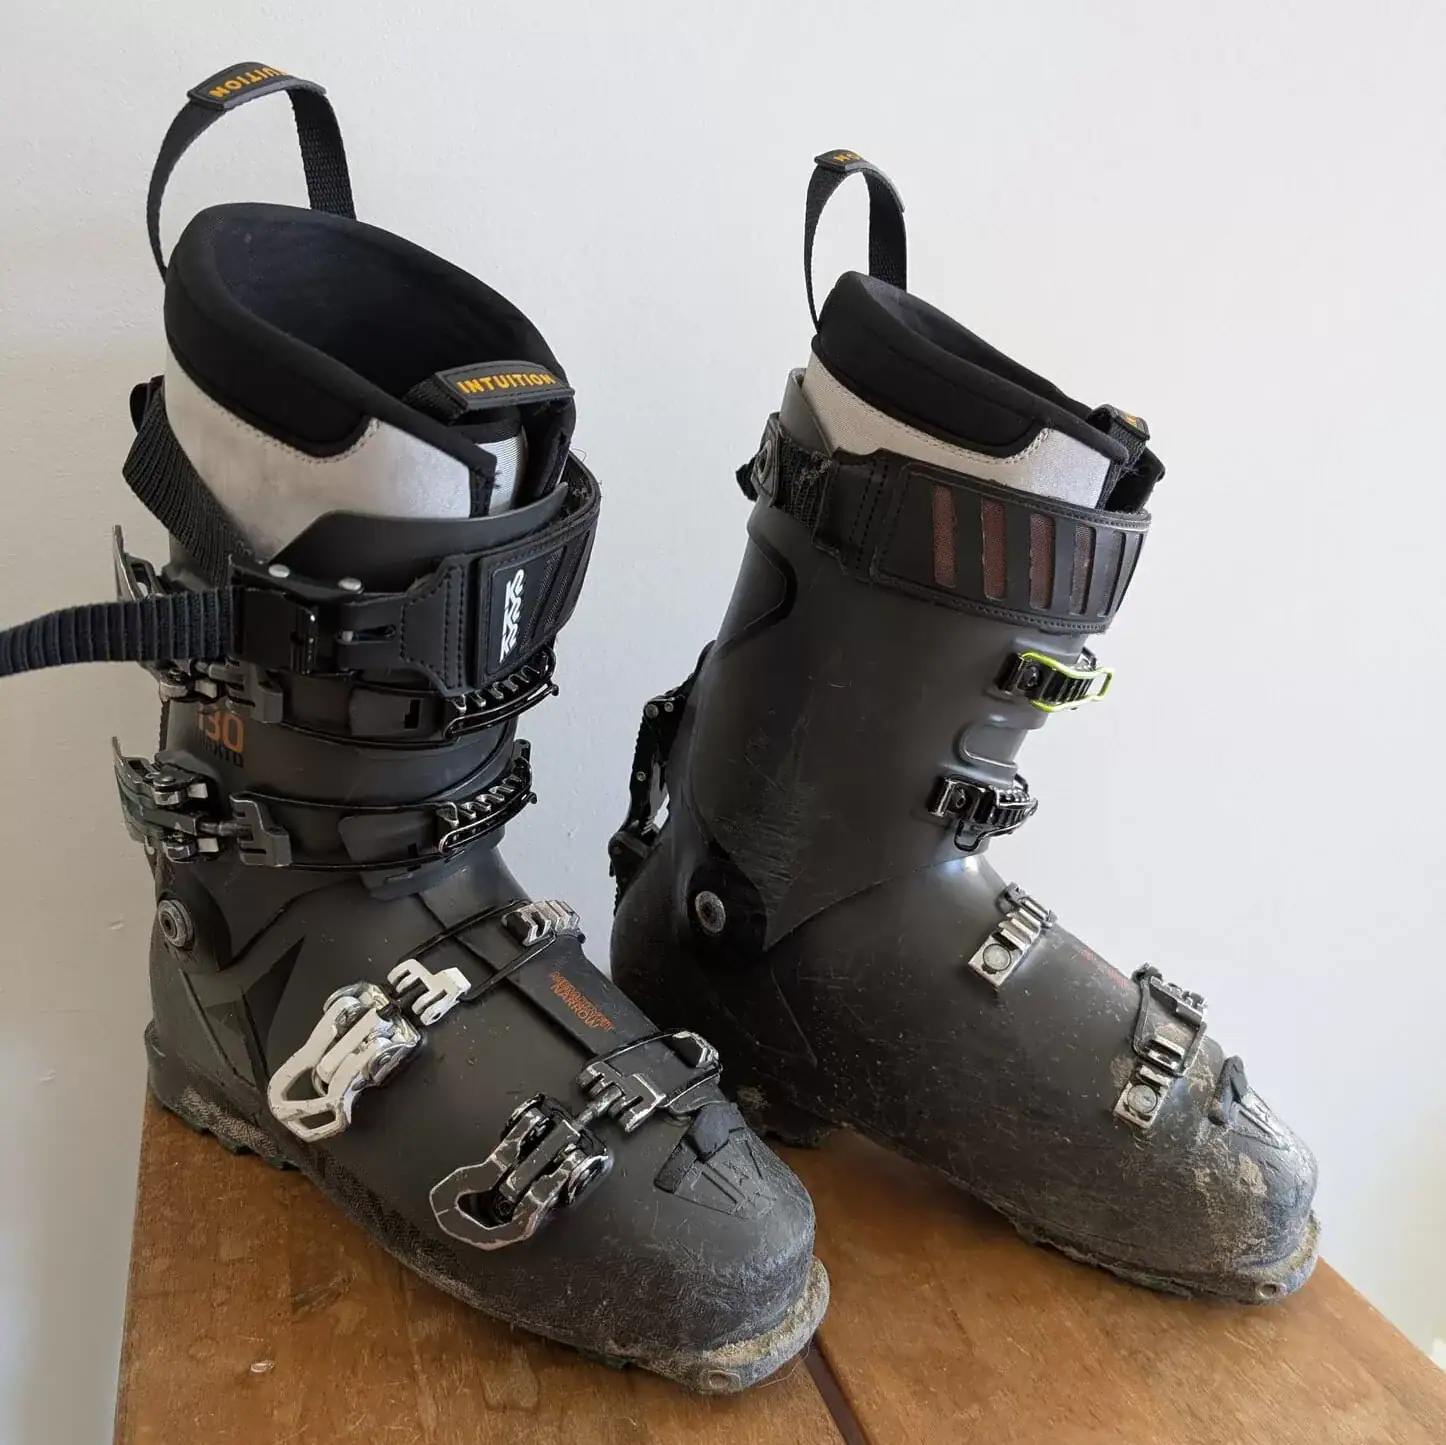
Moldable Boot Liner: The boot liner is critical to user comfort and boot performance. Ski touring liners are typically made of flexible fabric at the ankle, allowing for a more comfortable stride. Their lighter weight comes at the cost of downhill performance. The thinner foam will pack out faster than its resort skiing equivalent. Heads up: your shins may be bruised by the end of a sendy resort day. It’s also worth noting that ski touring liners rarely keep your feet warm, as they are designed for intense physical activity. Keep that in mind when using them at the resort. I recommend buying another pair designed for resort skiing from a reputable brand such as Intuition Liners.
When Is It Time To Replace Your Ski Touring Boots
I cannot emphasize further the importance of getting a fresh pair of ski touring boots every few years, depending on usage. A worn-out ski touring boot will cause the following issues:
- The plastic shell will lose stiffness over time, introducing a delay in the power transmission from the user to the ski.
- The liner’s foam (the one directly on your socks) will pack out, aggravating the above issue and causing additional blisters. Personally, I ski more than 100 days per season and change out my liners every year. If I were drowning in cash, I would swap them twice per season.
- The toe and heel welts (the ones that clip into your bindings) will wear down, creating additional compliance between the boot and the binding. Compliance will eventually lead to premature releases… think high-speed ejections. Been there, done that.
- The rubber sole (typical of ski touring boots) will wear down. You will be skating instead of walking.
Those are all problems that can be solved by either refurbishing an old pair of boots or buying a new pair.
Closing Statement
And here it is, folks. Now, you know how to choose ski touring boots from the plethora of available options. Before I send you off, let me reiterate how important it is to try the boot first before buying. Go out there and support your local bootfitting shop. While they each have their own philosophy on how to get the perfect fit, as it isn’t an exact science quite yet, they will find the right boot for you. At the end of the line, happy feet will make you happy!

Related Articles
– How To Choose Touring Skis: Shred On
– How To Choose Ski Touring Bindings: Clip In & Ski
– How To Get Into Ski Touring (Backcountry Skiing)
Pingback: What To Pack For A Ski Tour: A Comprehensive Guide - The Uptrack