
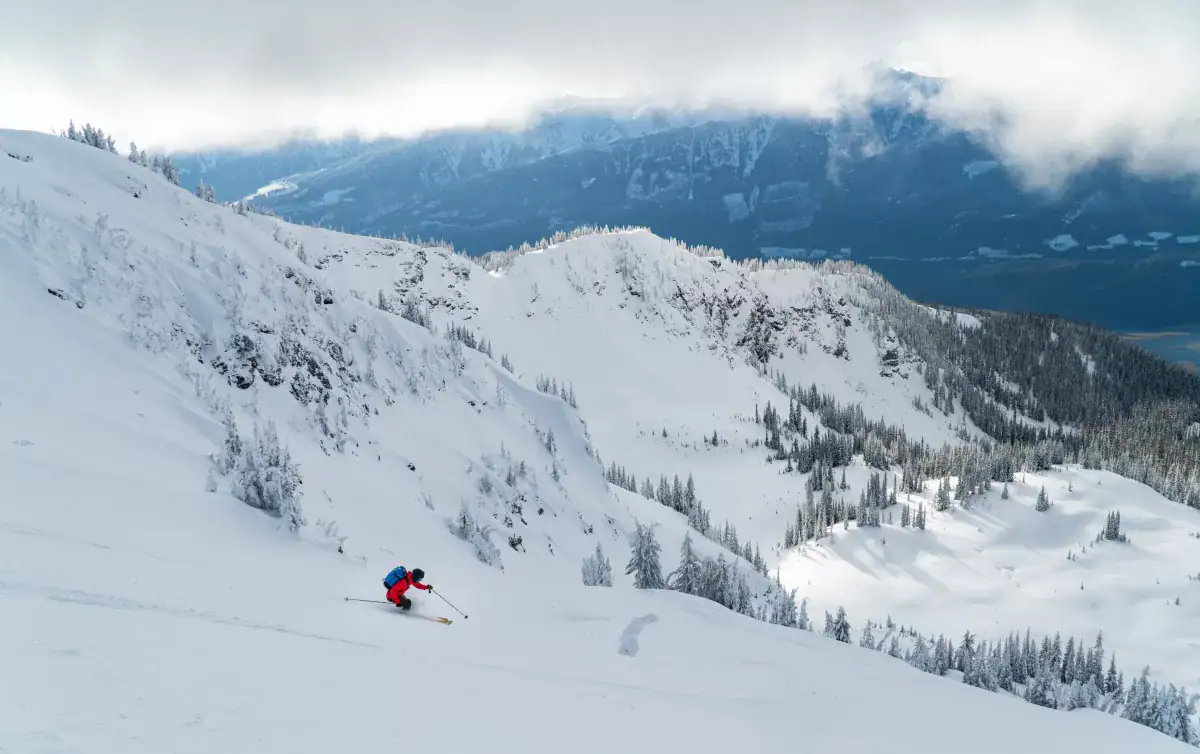
It’s late October, early November. Outside, the rain pours relentlessly, but your mind is somewhere else entirely: high in the mountains, where the first snow is falling. You’re pressed up against your bedroom window, staring through the low-hanging fog, dreaming of fresh powder. The alpine snowpack is building nicely, still a few weeks away from peak conditions, but already hinting at what’s to come. This is the perfect moment to fine-tune your readiness: check your gear, get your body in ski shape, and brush up on essential skills like crevasse rescue. Check out the content below to dial your pre-season preparation for ski touring and splitboarding.
Related: The Early Season Snowpack: How It Affects Your Winter
Pre-Season Gear Prep
A significant part of pre-season preparation for the ski touring season involves inspecting your gear. There’s no doubt – ski touring and splitboarding are gear-intensive sports. Keep an eye out for unusual wear, visible cracks, frays and verify the equipment’s functionality.
Skis, Boots and Poles
Starting with the basic gear, it’s worth checking the ski’s edges and top sheet for delamination, where it separates from the ski’s core. Slide your hand across your bases, feeling for deep gouges. It’s a great time to pull out that smelly PTEX stick and fix those gouges. Alternatively, a reputable ski shop can do the needed repairs for you. Inspect your bindings to ensure they clip in easily and that the rear turret risers are in good condition. To check the binding screws, gently attempt to pry off the baseplate from the ski’s topsheet.
Related: How To Choose Touring Skis
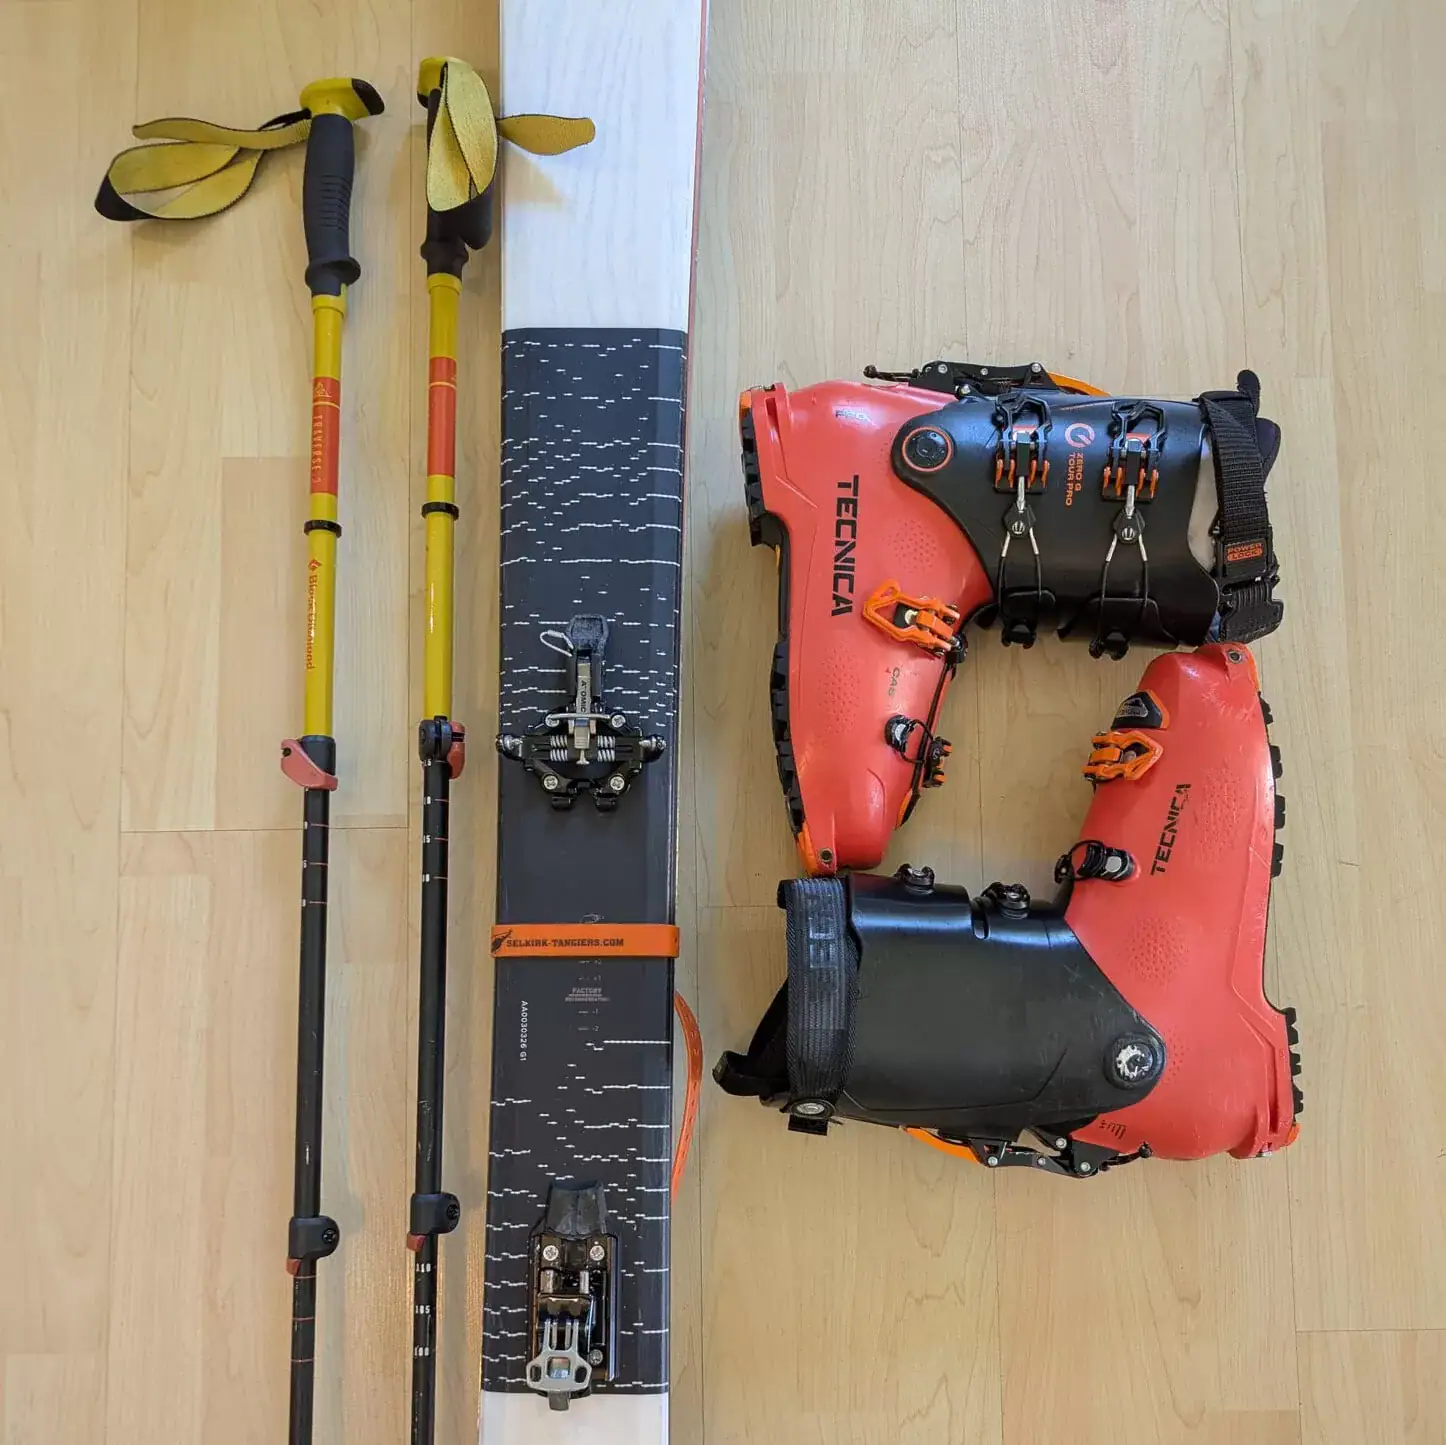
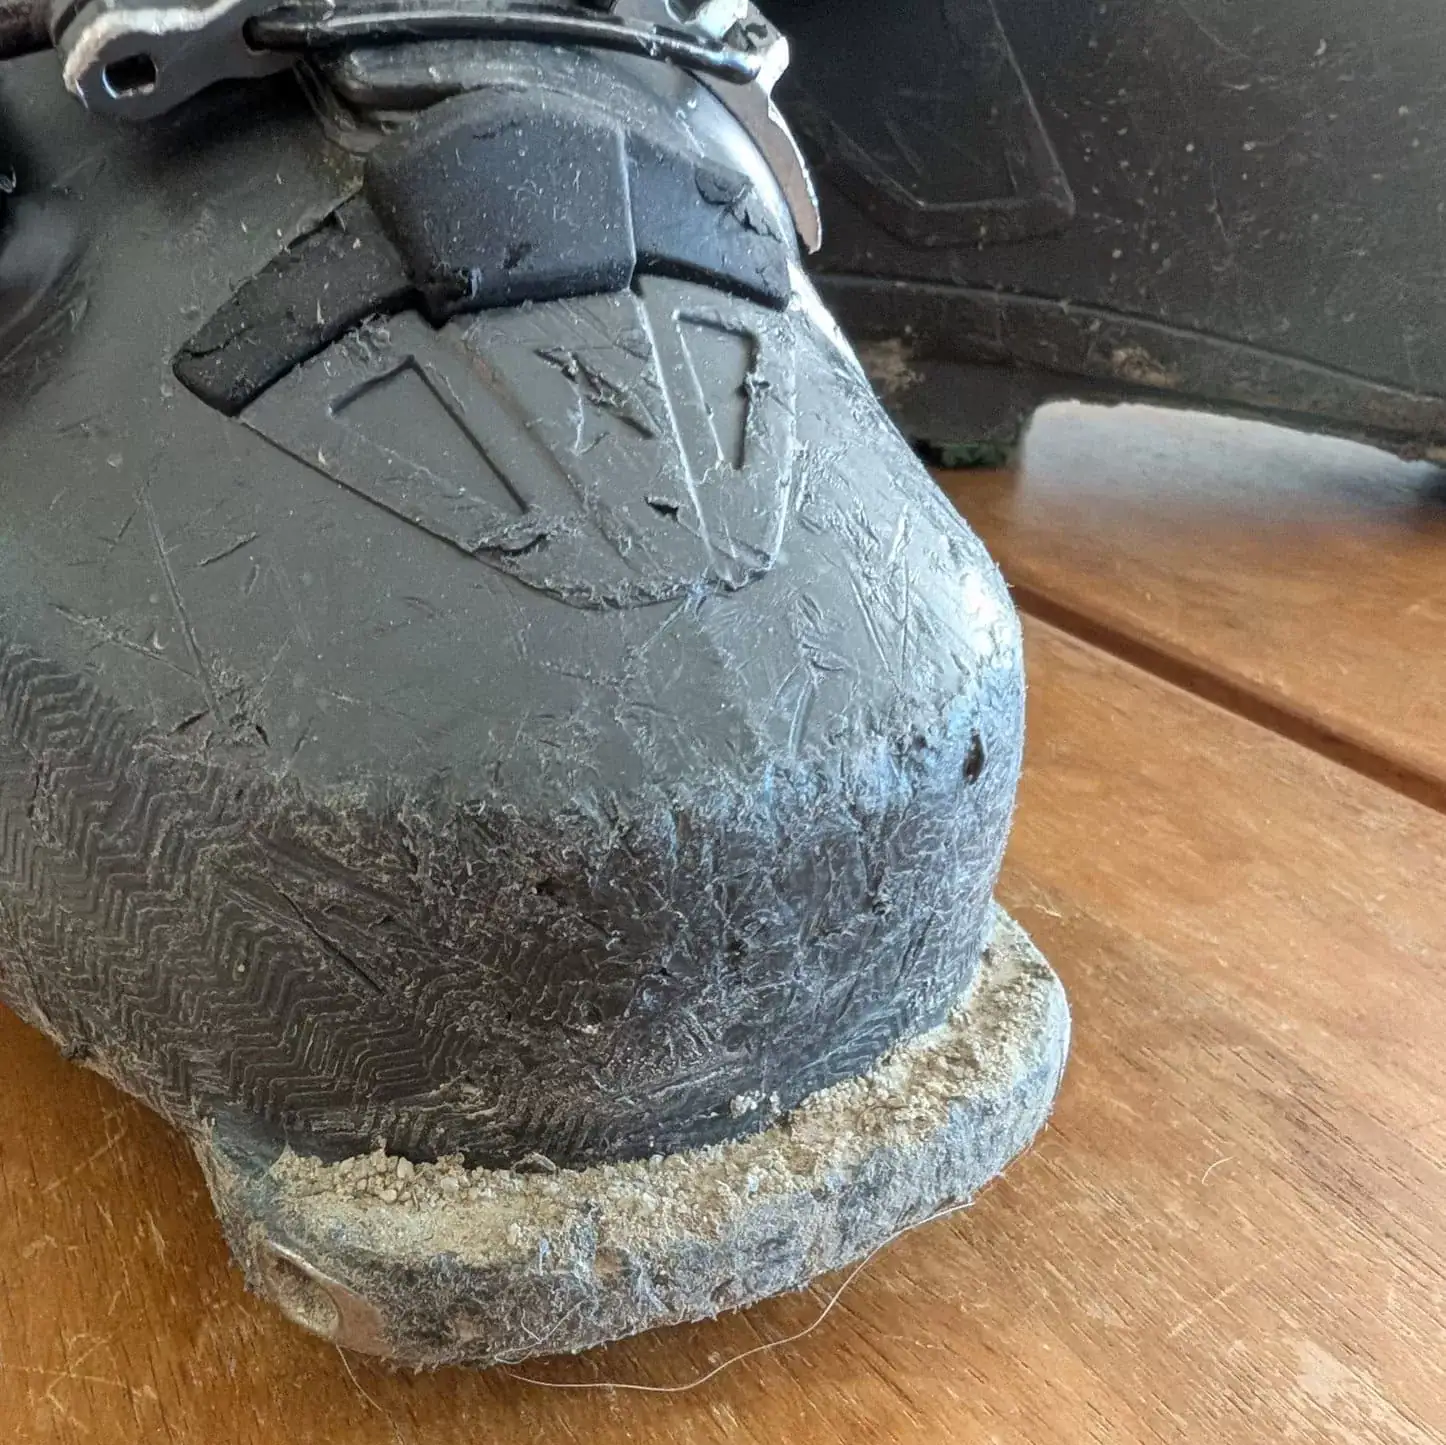
Regarding your ski boots, inspect the upper and lower cuffs to ensure there are no cracks in the plastic shell. Glance over the steel tech inserts and toe/heel welts to ensure they’re still securely embedded in the shell. Try on your boot liners – they pack out over time and often require a few tweaks by an experienced bootfitter throughout the season. It’s best to get it over early on so you can tour comfortably.
Fix your bent ski poles, keeping in mind that aluminum poles snap if forcibly bent in the cold. Heat aluminum poles with a torch, then bend them back into shape. If you’re using telescopic poles, make sure your ski poles can fully collapse and verify their locking mechanism. Trust me: you don’t want to have poles slip when skiing down an exposed feature. In the past, I’ve also forgotten to swap my pole’s low-profile hiking baskets for the oversized powder baskets. Learn from my mistakes.
Climbing Skins
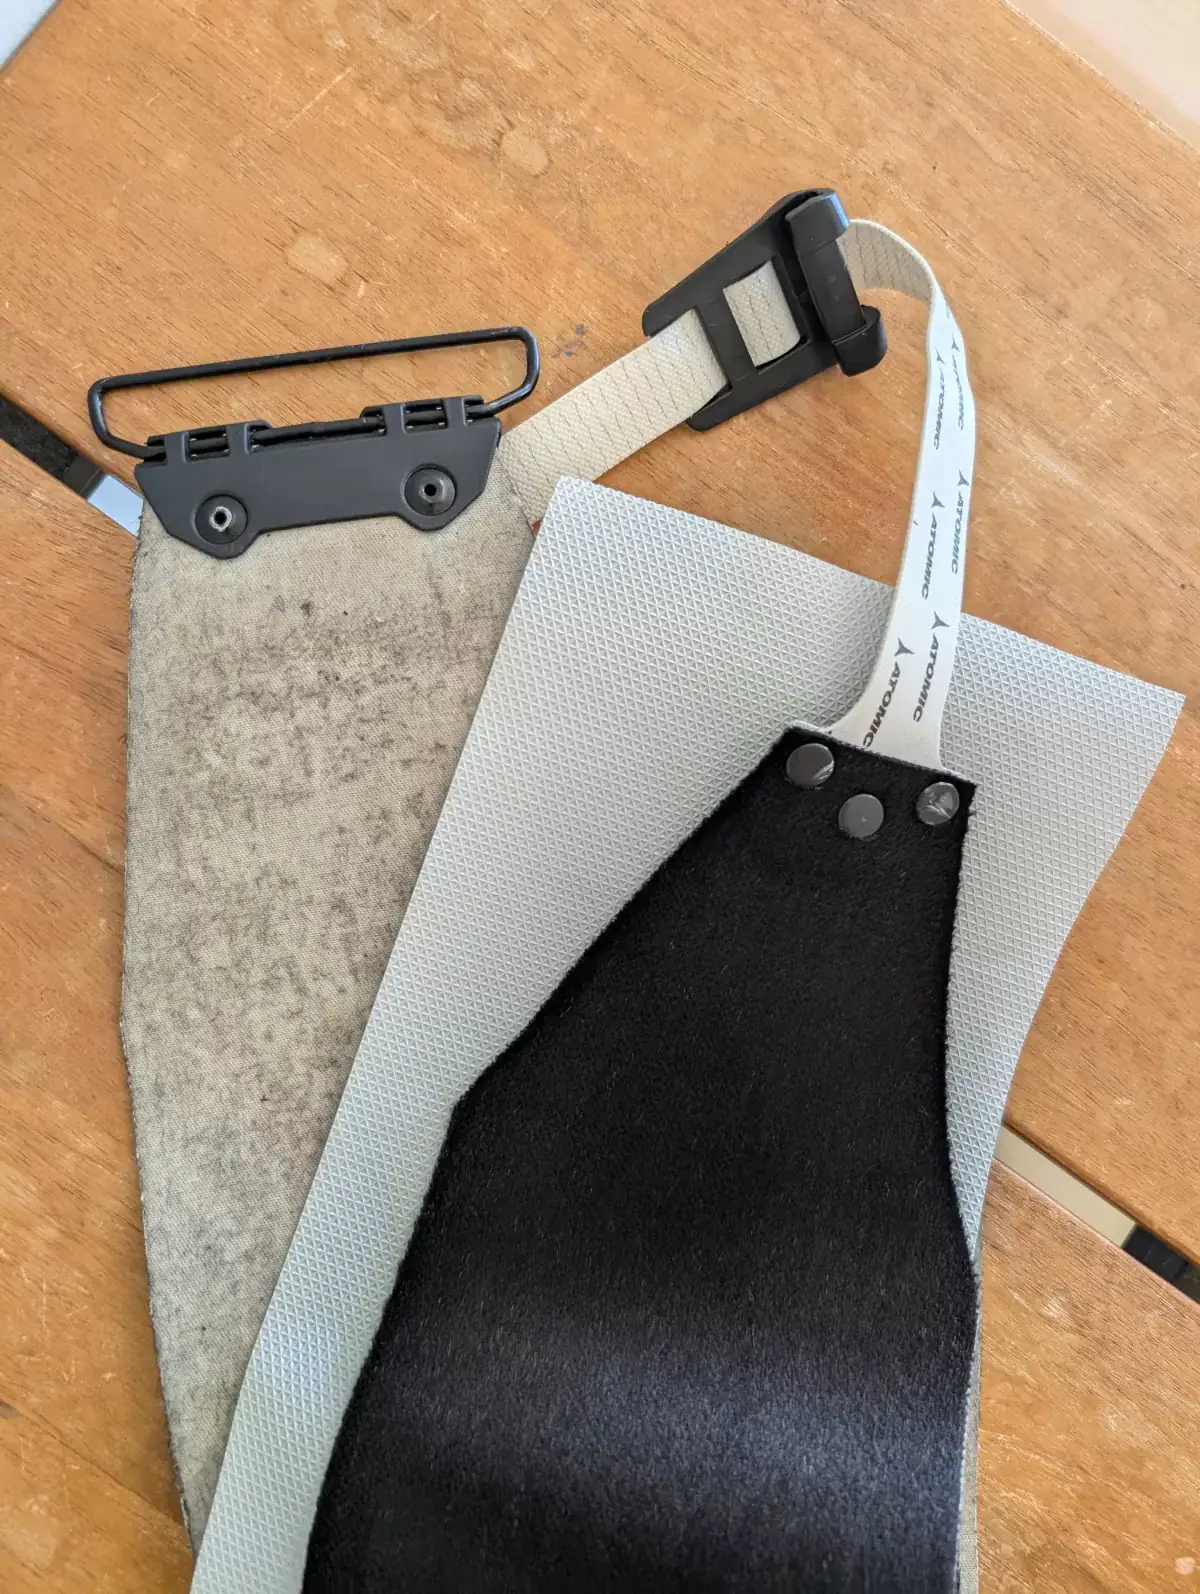
Take a moment to dig out your climbing skins from the back of your freezer. You’d be surprised – some folks store their skins in their freezer to preserve the skin glue. Inspect both the plush for cuts or odd frays and verify that the glue is working properly. Take a look at your tip and tail connectors as well.
Related: How To Choose Climbing Skins
Avalanche Rescue Gear
Here’s another crucial tip regarding ski touring pre-season preparation: inspect your avalanche rescue gear. That includes your transceiver, shovel, and probe. These days, a transceiver with three antennas and multiple burial functionality is standard. If your device doesn’t meet that, it’s probably time to consider an upgrade before hitting the winter season.
Related: How To Choose An Avalanche Transceiver / Beacon
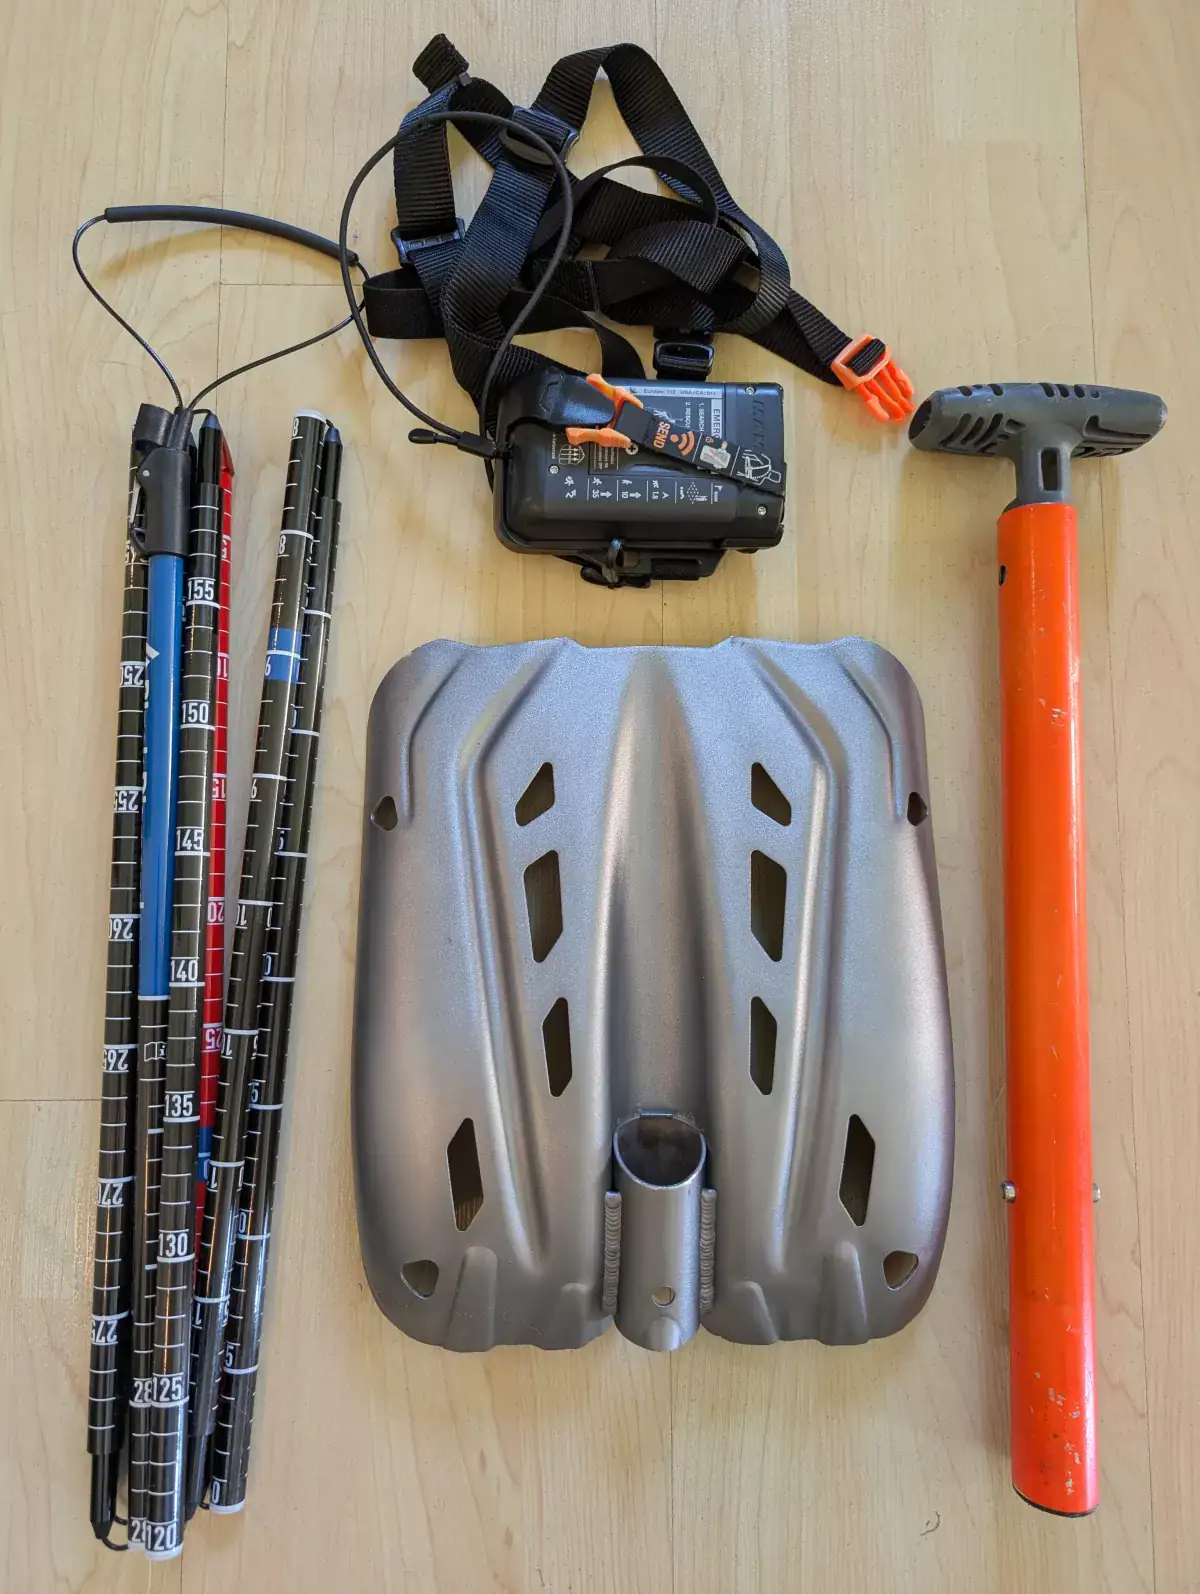
Practice companion rescue scenarios with your touring partners. It’s the fastest way to see if your avalanche tools actually work and to build muscle memory for high-stress situations. In the fall, I always run a full transceiver function check. Take a close look at the depth markings on your probe as well. They tend to wear down inside your backpack. Without accurate depth readings, even a well-practiced rescue can be slowed or complicated.
Backcountry First Aid Kit
A solid backcountry first aid kit isn’t just a nice-to-have; it’s an essential piece of gear for ski touring. Before your first tour of the season, take the time to check every item and make sure your kit is fully stocked. Small but critical items, like blister bandages, moleskin patches, or rolls of KT tape, often vanish over the winter months. Don’t wait until you need them in the middle of a backcountry skin track or a remote descent. Resupply basics such as gauze, adhesive tape, antibiotic cream, and pain medication. Consider also including items for cold-related injuries, like chemical hand warmers, extra gloves, or a space blanket, and any personal medications or allergy treatments you might need.
A well-prepared kit can make the difference between managing a minor incident efficiently or turning it into a serious problem. In the backcountry, help is not just around the corner, so being ready means not only having the supplies but knowing how to use them. Below is a suggested list of common first aid items to include in your backcountry kit.

Backcountry Repair Kit For Ski Touring and Splitboarding
Before your first backcountry tour, take a close look at your repair kit and make sure it’s fully stocked. A well-prepared kit should cover all the essentials to handle common gear and clothing issues in snowy, remote environments. Think about skis, splitboards, boots, poles, and even your outer layers, anything that could fail or need quick adjustment on the skin track or descent.
Check your inventory of screws, nuts, and other hardware and update it to match your current setup. If you’ve changed bindings, ski boots, or other gear since last season, you may need to swap out certain screws or small parts in your kit. It’s also worth including a multi-tool, spare straps, duct tape, ski crampon screws, and a small roll of climbing wire. Even minor fixes, like a loose binding or ripped gaiter, can turn into a frustrating or dangerous situation if you’re unprepared. Regularly reviewing and refreshing your repair kit ensures that when a problem arises in the backcountry, you can fix it quickly and safely without cutting your day short. Preparation in the garage before you head out can save hours and headaches on the mountain. You’ll find below a list of suggested items to complete your backcountry first aid kit.

Pre-Season Vehicle Prep
Getting your vehicle ready for winter might not feel like part of ski touring pre-season preparation, but it’s every bit as important. Around Revelstoke, my home base, winter or mud/snow tires are mandatory for driving through mountain passes like Rogers Pass. I run dedicated studded winters on my AWD rig, and the difference on icy, snow-packed roads is night and day. At highway speeds, good traction and smart driving habits matter far more than having an AWD or 4×4 badge. If you’re renting a vehicle, know that most companies only supply all-season tires with the standard fee. My advice? Pay the premium for proper winter tires. They’re worth their weight in gold.
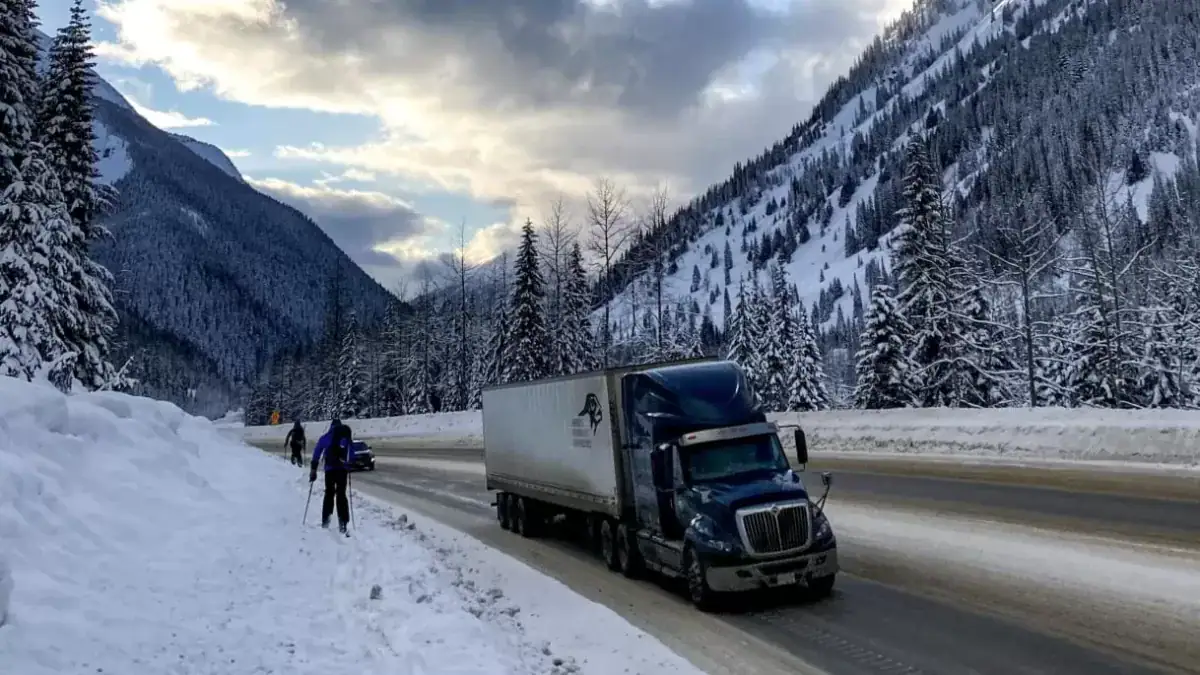
I also keep a small emergency kit in my truck: first aid supplies, road flares, tire chains, and a stash of canned food. That kit has already paid for itself during long road closures from accidents or avalanches. Once, I was stuck for more than four hours while crews cleared avalanche debris off the Trans-Canada near Rogers Pass. Out here, delays are part of winter travel. Drive slow, drive smart, and be prepared.
Pre-Season Training
Working as a ski guide, I spend a healthy chunk of my pre-season training for emergencies. This ranges from dusting off my avalanche rescue training, practicing my crevasse rescue rigging skills and refining my first aid skills. While my emergency response trainings are based on an operational context, whether I’m heli-skiing or ski touring, recreationalists should practice those skills on a seasonal basis. Sadly, too few dedicate the time required to do it properly.
Avalanche Rescue Training
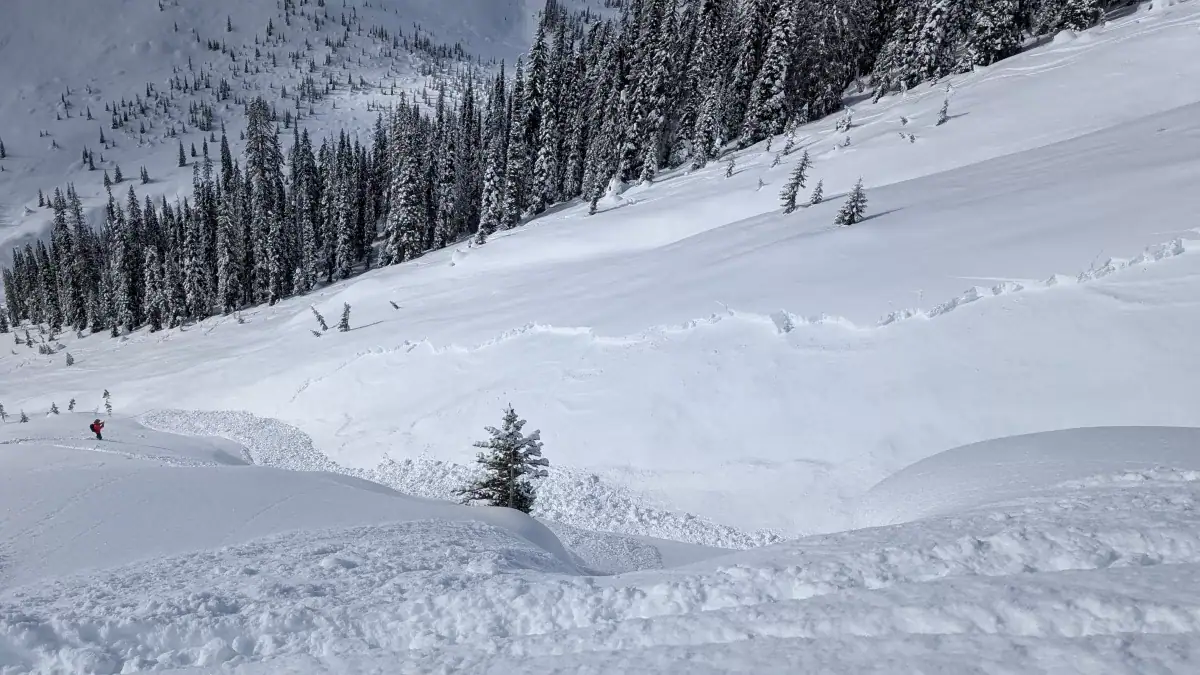
Avalanche rescue is never as simple as it sounds. On paper, it’s just three steps: find the victim with a transceiver, confirm their location with a probe, and dig them out with a shovel. In reality, it’s messy, high-stakes, and often chaotic. That’s why I put myself through regular practice scenarios. The most useful drills, I’ve found, are the ones that push me outside my comfort zone: multiple burials in treed terrain. Forests are disorienting; they force you to slow down, build a mental map, and really think about how you’re moving through the scene. Those details matter because in a real emergency, you won’t have the luxury of clarity.
Early in the season, many operators run Avalanche Skills Training (AST) courses that mix avalanche terrain management with rescue scenarios. For those who want to strip it down and focus purely on emergency response, companion rescue courses are another option. Either way, the practice pays off because, when the chaos is real, the training kicks in and the response becomes automatic.
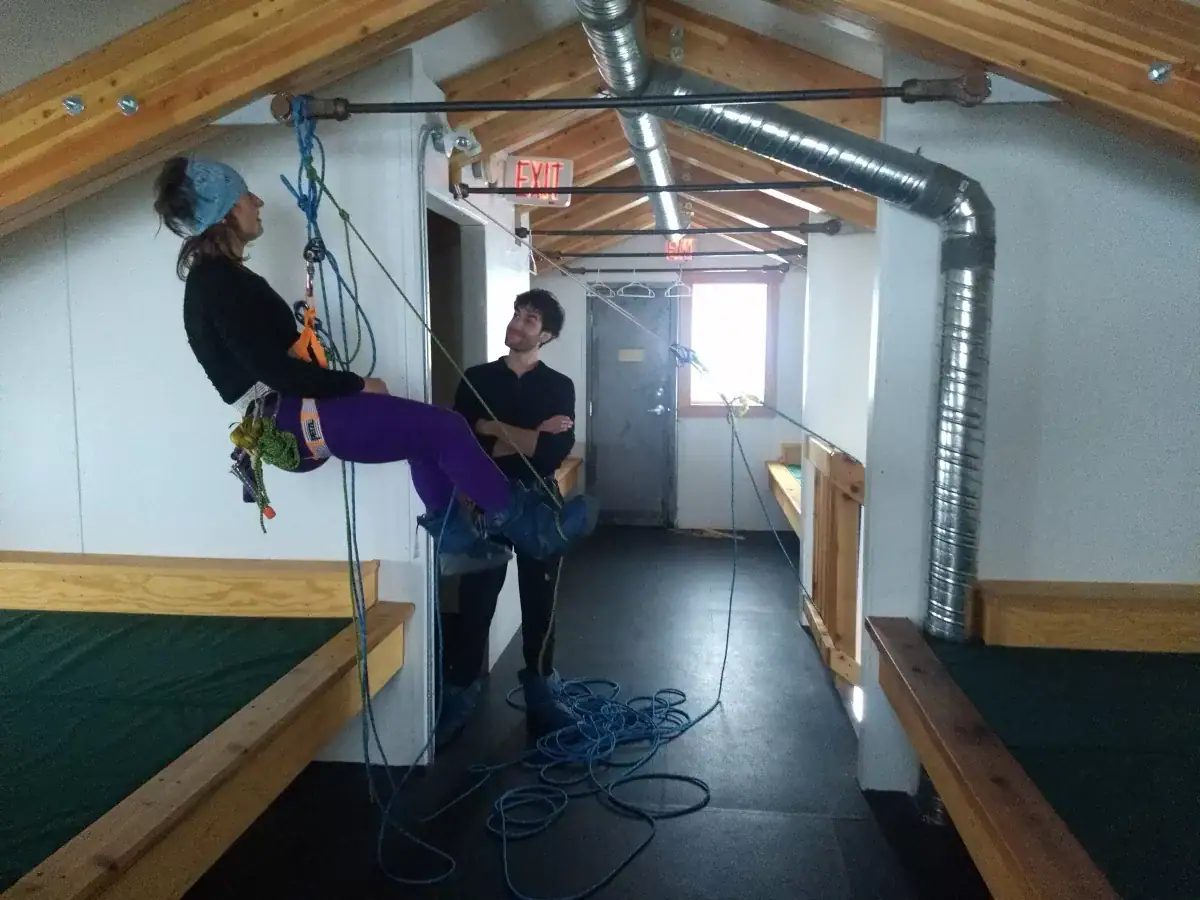
Crevasse Rescue Training
If you’re planning to travel in glaciated terrain, a crevasse rescue course and regular practice are non-negotiable. It’s an important pre-season preparation for ski touring or splitboarding. Rope systems like the Z-pulley (3:1 advantage) or the Canadian Drop Loop (6:1 advantage) provide the mechanical advantage needed to haul a partner out of a crevasse – but they require detailed rigging skills that are easy to forget under pressure. Even as a professional, I find myself re-learning the finer points each November during pre-season training. Effective crevasse rescue comes down to precision and repetition. The only way to truly be ready is to practice, again and again.
Backcountry First Aid Training
When you travel into the backcountry, you step into an environment where professional medical help may be hours or even days away. In these settings, first aid training is not just useful, it’s essential. The ability to assess injuries, manage medical emergencies, and improvise with limited resources can make the difference between a manageable situation and a life-threatening one.
Backcountry first aid differs from the classic occupational first aid in key ways. Hazards in the mountains result in injuries from sprains, fractures, and multi-trauma to illnesses from hypothermia to altitude sickness and allergic reactions. Unlike urban settings, you can’t rely on a quick ambulance ride or a nearby emergency room. Backcountry first aid training equips you with the skills to stabilize a patient, relieve pain, and make critical decisions about evacuations over more than 48 hours. For example, knowing how to splint a broken leg with poles, manage shock in freezing conditions, or recognize early signs of hypothermia can save lives. In short, it’s not optional – it’s a must.
Physical Conditioning
And then there’s pre-season physical conditioning, the part everyone knows about but too often skips. Ski touring and splitboarding demand far more than just strong legs. It requires endurance and stability. Long climbs, heavy packs, and variable snow conditions push your cardiovascular fitness to its breaking point, while steep descents and tricky terrain test your strength and balance. Pre-season conditioning reduces the risk of injury, helps prevent fatigue, and makes long days in the mountains more enjoyable. A mix of aerobic training, strength work (especially core and legs), and flexibility exercises will prepare your body for the uphill grinds and downhill rewards that define ski touring and splitboarding.
Picture this: it’s early November, your skis are freshly tuned, your pack is dialled, every feature checked. You clip into your bindings for that first day back in the mountains, buzzing with excitement. Then, in a split second, a sloppy fall leaves you with a blown knee and a broken arm. Just like that, your season is over before it even began. The truth is, a stronger, better-prepared body might have saved you from that fall. With the right conditioning, you’d still be skiing today. That’s why your pre-season preparation for ski touring or splitboarding is so important!